
Create a Trello "Send Status to Slack" Button
How to create a button in Trello to send a notification in Slack with PixieBrix


I recently wrote about how to create a button on Github issues that you can click to notify your team you’re working on an issue. But you know me and Trello… so I had to of course set this up for Trello as well.
Here’s how it works:
You click a button, select the status, and it will send a message to slack saying “{your name} is {your status} on {this card you’re working on with a link to it}”
Super cool, yeah? It’s a great way to let your team know what you’re working on and when and can be an easy way to foster a discussion about it or keep track of tasks in a Slack channel.
If you want to set it up yourself or create something a little more custom (say, including a message to go with that Slack message), keep reading. More of a video person? Follow along with my PixieBrix Trello Button video tutorial.
Getting Started with PixieBrix
If it’s your first time using PixieBrix, you’ll need to set up a PixieBrix account. Once you do that, add the Chrome Extension, and then you’re ready to start building! On any webpage (even this one you’re reading this on), just right-click the page and select the “Inspect” option.

What you see next might make you feel like you’ve just fallen into the Matrix. But don’t panic!
Look on the top bar for “PixieBrix”. Don’t see it? You might have to click the arrows at the end to show more options.

Once you’re there, hopefully, it will look a little less scary, and you’ll be ready to start your PixieBrix creations. Welcome to what we call “the Page Editor”!
Now, head over to Trello, open up a card, and PixieBrix might ask you about granting permissions. If so, say yes to that! If not, refresh the page 😊
Add a Button brick
It all starts with a button! To create a button, just click “Add” in the top left corner.

Select “button”.
To determine where you create the button, you’ll want to click that little blue (green?) mouse icon, and then go back to your browser and move your mouse around. You should see various sections highlighting. (If not, then you might need to select the mouse button from PixieBrix again.) Now while everything is being highlighted, go click on a similar button to the one you want to create.
In my case, I selected the “Edit” button on a card next to subscription so it looks like this.

Add the Show Modal brick
If you wanted to keep it really simple, you could skip this step and just make a user click once to send a message to slack saying “brittany joiner is working on this issue”. But I wanted to let the user be able to select how they were working on that issue to create a more useful status update.
To do that, you’ll need to add the “Show a Modal or Sidebar Form” brick.
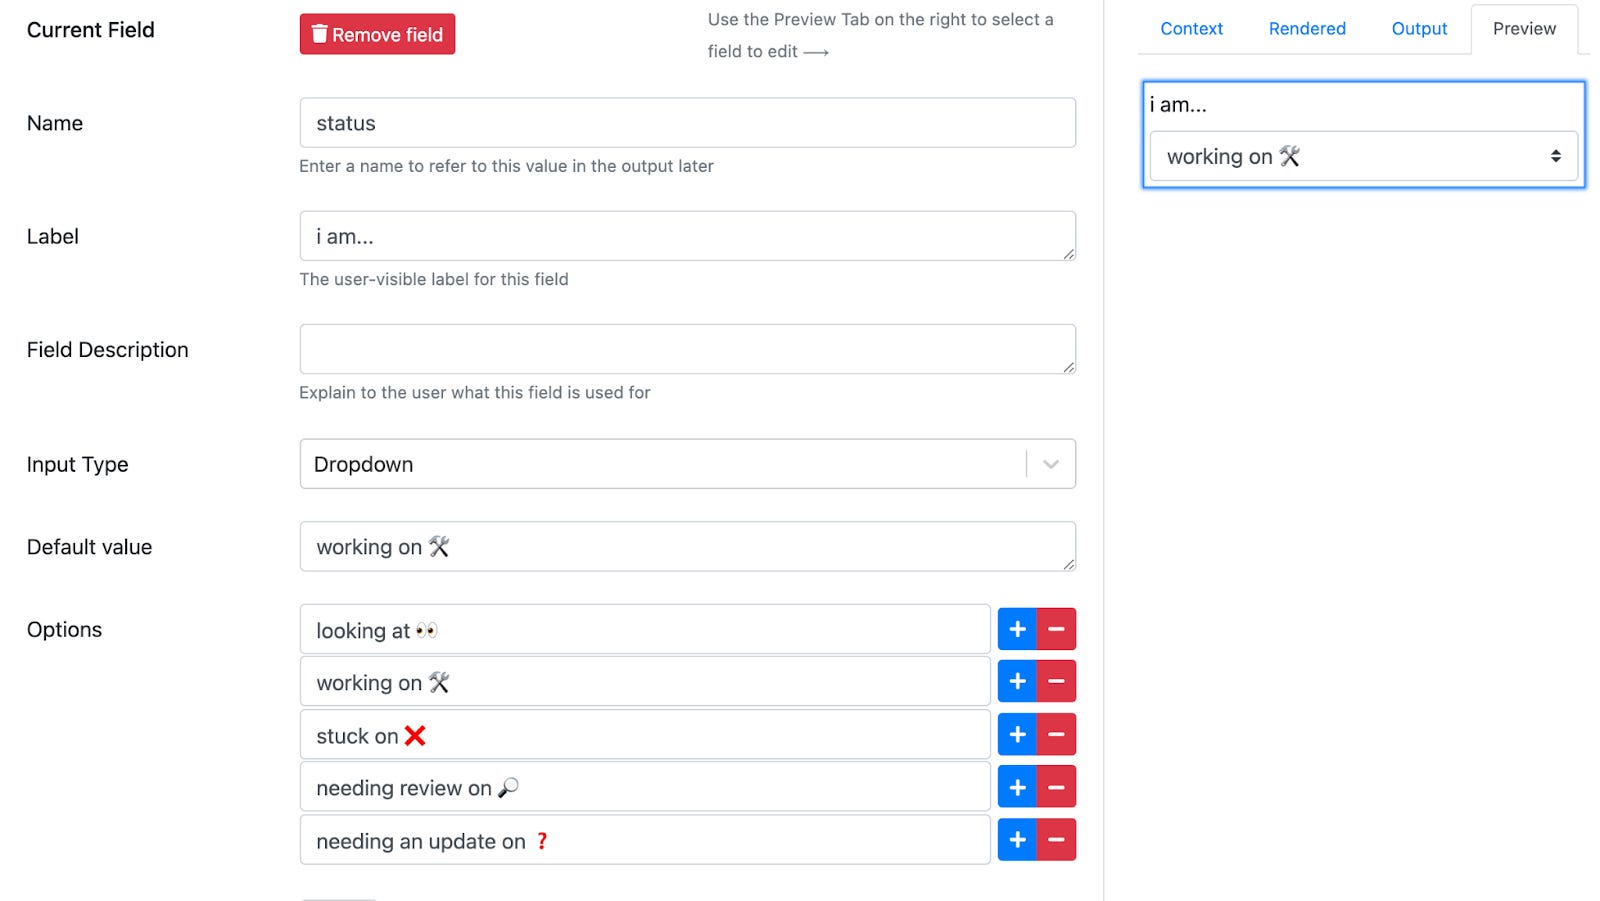
By default, it will be a modal that pops up in the browser, so you don’t need to change anything for that behavior. You will need to create a form field for the status. Just create a field, name it, and add a label and type (I recommend dropdown), and then add the default value and the options (assuming you followed my advice and chose dropdown). When you’re done, it should look like this:
You could add more fields, such as a multiline text field if you wanted to let the user be able to add some more notes or comments before the message goes to Slack.
Before you leave, make sure at the top you set the “output” as something recognizable so it’s easier to reference later. It should default to “form”, but you can change it if you’d like although I don’t recommend that.

Note - if something doesn’t work as you try this out, you might not be referencing the data here correctly! Make sure when you call this data, it matches the output (in my screenshot, it’s set to “form”) and field name (in my screenshot example, it’s called “name”), so referencing that username is @form.name .
Finding the Trello username
The next part gets a little hairy, so stick with me.
I wanted to be able to customize the Slack message to say who was doing this update. For instance, “Brittany is stuck on Creating Content”. To grab that username requires a little hacking.
You’ll need to add several bricks for this.
Simulate DOM Event (to close the issue)
Add this brick, and then just like we used the mouse selector to pick a button, we’ll use it to select what we want it to click. Which is the “x” button in the top right of a card.
Then select the “click” option for event.
(Should look like this)

This will close the card so we can then open the user menu.
Add another “Simulate DOM Event” brick (open profile menu).
This time, rather than closing anything, we’re going to select and click your profile picture in the top right.
Remember, just click the mouse icon next to “Selector” then go back to the webpage and click the element you want PixieBrix to click for your - which is your profile picture in this instance.
Make sure to select “click” for event. (I forgot this when I was first building it and it didn’t work because I didn’t tell if what to do on that element!)
Add a “Wait for DOM Event” brick (make sure the username loads)
Now we need to add a brick that waits until the username loads. Add this brick, and then once again, you’re going to grab that selector, and this time, click on the username that appears just below your profile picture.

Don’t worry about setting anything for the “maxWaitMill”. You shouldn’t need to put anything there.
Okay we’re so close! One more then we’re done!
Add the JQuery Selector Reader brick (to save that username as a value)
Now we’re going to tell PixieBrix “hey, you know that thing I just told you to wait for? Can you go read it and pull that value?”
The way we tell it that is by clicking “Add Property” and under “Property” we’ll type something like “Name” (you can call this whatever you want - just remember it because you’ll need to reference it in our final step to send this to Slack). Now copy exactly what we put in the last brick in the selector value and paste that in the “value” section.
Should look like this.

One more thing - see at the top where it says Output? I renamed it “trello” so I’d be able to reference this more easily.

Now you’re ready to put it all together and send your Slack message!!
Send to Slack
Add the “Send a Slack Message” brick.
You’ll need to configure a hookURL for your Slack workspace. If you haven’t done that already, you can learn more about it and add it to your Slack workspace here. You’ll need to select a default channel, and it will generate a URL that looks something like this.
https://hooks.slack.com/services/305810394582903485/B02P058BVJR/g33MaY7SFc4VQbuS8GtBLFd2
Once you have that, plug that in where PixieBrix says “hookURL”.
Next, you can name your bot and select an icon. (These steps are unnecessary and it doesn’t matter what you call it or what icon you select, so don’t stress too much over picking the perfect emoji. You can always change it later.)
Select the channel you want to send the message in. (If you want to get fancy, you could hard code a list of Slack channels in your modal from Step #2 and let a user select not just the status but also the channel they want to send the update to. I didn’t do that, and instead I’m just defaulting it send to a “#status” channel.)
For “text”, this is the message you want to show. If you’ll followed along and set everything up like I did, you should be able to copy and paste this.
{{@trello.user}} is {{@form.status}} <{{{@input.url}}}|{{{@input.title}}}> If you try that and it doesn’t work (or just in case you’re curious), here’s the anatomy of that.

One more brick to finish it all up
Lastly, I added the “Redirect Page” brick, because I had to close the Trello card to be able to get the username, and I thought it would be annoying to open a card, click the “send status” button and then have to go back and find that card up again. Too many clicks!
So I just added the “Redirect Page” brick and set the redirect URL to be the URL from the very first brick (our button brick) and viola! Now when the action is all done, you’re right back to where you started with an open Trello card ready to be worked!

Make sure to click save, and then try it out! You should see a message like this in the Slack channel you designated.

If you get stuck, here are a few helpful troubleshooting tips:
Check your output and variable names. Did you spell everything right? Are you referencing everything correctly? (See my note under the Show Modal brick.)
Are you using the right amount of { } around variables? If it’s a URL, you’ll likely need to use three {{{ because otherwise, it can return weird characters. So if you’re getting an error, make sure your URL is being referenced correctly.
Add a “window alert” brick after each step to see where it’s breaking. This will let you set an alert that pops up in your browser, and you can set the message to what you are hoping to get from other bricks so you can debug if you’re getting some incorrect data or if it’s not passing through at all.
And if you’re still stuck, don’t hesitate to reach out to the PixieBrix community and someone will happily jump in to help!