
How To Send Links to Trello with PixieBrix
Custom Trello Automation From Any Website

Have you ever wished you could have more customization with the way you automate Trello? Zapier and Butler are fantastic and cover so many use cases, but sometimes, you just need something else. I recently discovered PixieBrix and at first, I thought the UI was a bit too clunky and it was way too technical for me. But after taking a little time to get into the product, I began to see its potential and realized it was actually easier to navigate than I thought.
Of course, my first thought was “how can I use PixieBrix to make Trello even more powerful than it already is?” And while there are a lot of different use cases that came to mind, there’s one I really want to focus on.
Some of you might be aware of the Trello Chrome Extension, which is a fantastic tool that lets you add a link to Trello from anywhere on the internet. It’s amazing, but based on this post it sounds like it’s being deprecated (or at least deprioritized). In fact, if you haven’t already installed it, you can’t get it. And if you’re one of the lucky ones to have already installed it, you might notice it periodically disappears and you adventure into the depths of your Chrome settings to re-enable it. I’m expecting it to completely disappear for good any day now.
But the good news is, whether you have the extension or not, you can easily create your own customized tool for saving links to Trello with PixieBrix.
Prefer videos over skimming text? Watch this 11 minute tutorial on how to use PixieBrix and Trello.
What is PixieBrix?
PixeBrix describes itself as “a low-code extension builder to rapidly customize and automate the web tools your teams already use”. Think of something like Zapier, but rather than rules set up in the background when a trigger happens, these automations are incorporated as part of what you see on a website by adding elements like a button to or accessing highlighted text.
When that element is engaged, you’re able to trigger all sorts of pieces of automation to happen, like sending data to Trello.
A brick is a component added to an extension to make the magic happen. For instance, a brick could be something like reading selected text or transforming information (like getting an exchange rate), or sending a message in Slack.
You put bricks together to integrate the tools you use and make a seamless workflow experience!
So what does this have to do with Trello? PixeBrix integrates nicely with Trello by reading card data and allowing you to create cards from data. It’s a handy way to create automation with other tools that you might not have otherwise been able to do with native Trello features or even power-ups.
While there’s a handful of uses I can think of for it, the first one that came to mind was creating a Trello card from a URL (similar to the experience with the Trello Chrome Extension), so we’ll walk through exactly how to do it. Go ahead and set up your account at PixieBrix and follow along.
Demo: How To Use PixieBrix (Basic)
After you’ve set up your account, make sure you install the PixieBrix Chrome Extension.
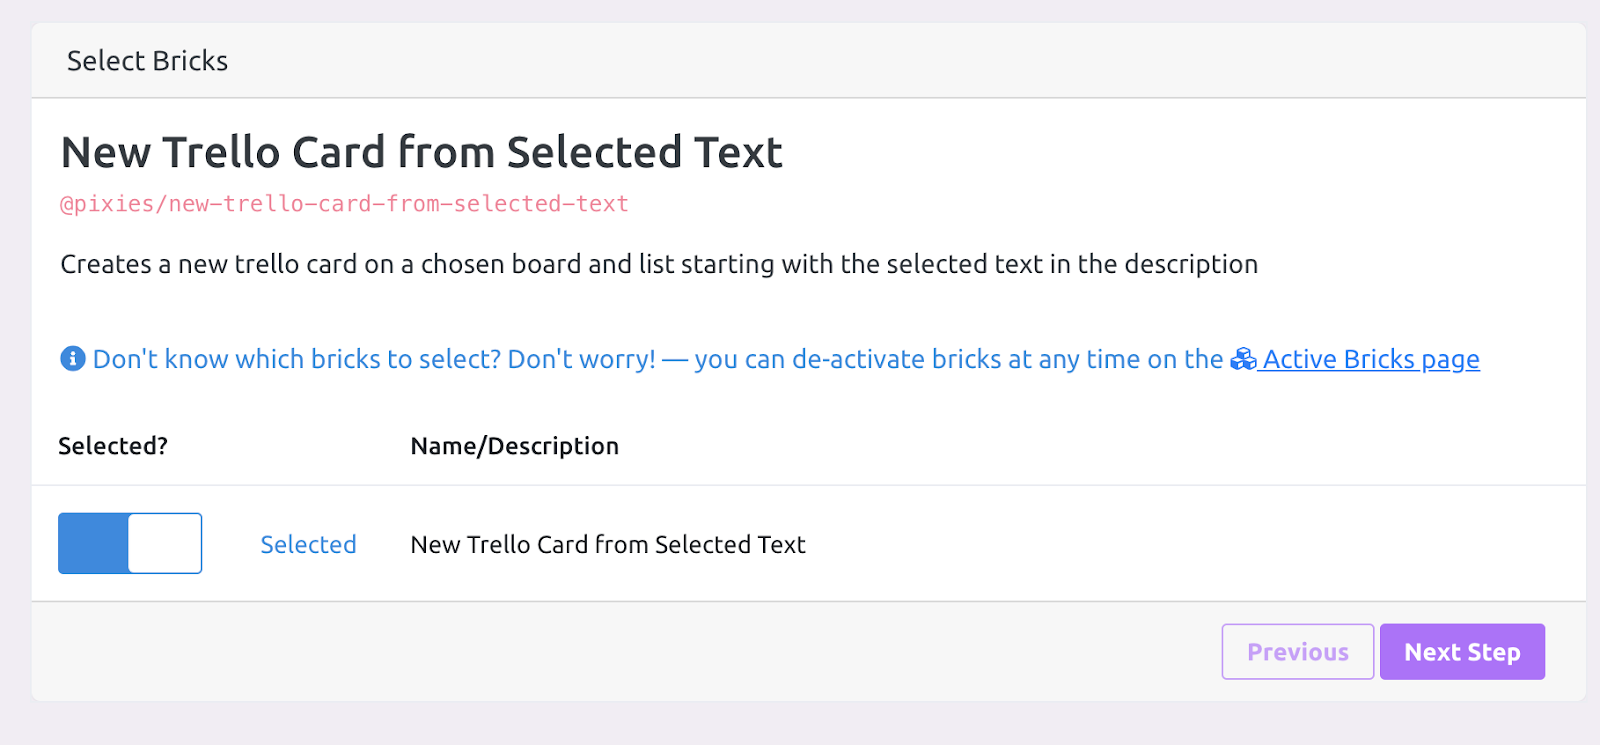
After that, head over to the marketplace and search for Trello. (We’re going to ease ourselves in and start super simple. You don’t even have to create anything custom with this one!)

Click activate, and follow the prompts. You can just click “Next Step” since this first one is just confirming which brick you’ve selected.
The next step asks you to confirm your Trello account. If you don’t have one added, you’ll need to click “Add new”.

Don’t worry - this form might look intimidating, but there are links underneath each line to show you exactly where to get the info!

Once you’ve got that, just select “Next Step”, and then click ‘Activate’!
Now let’s try it out.
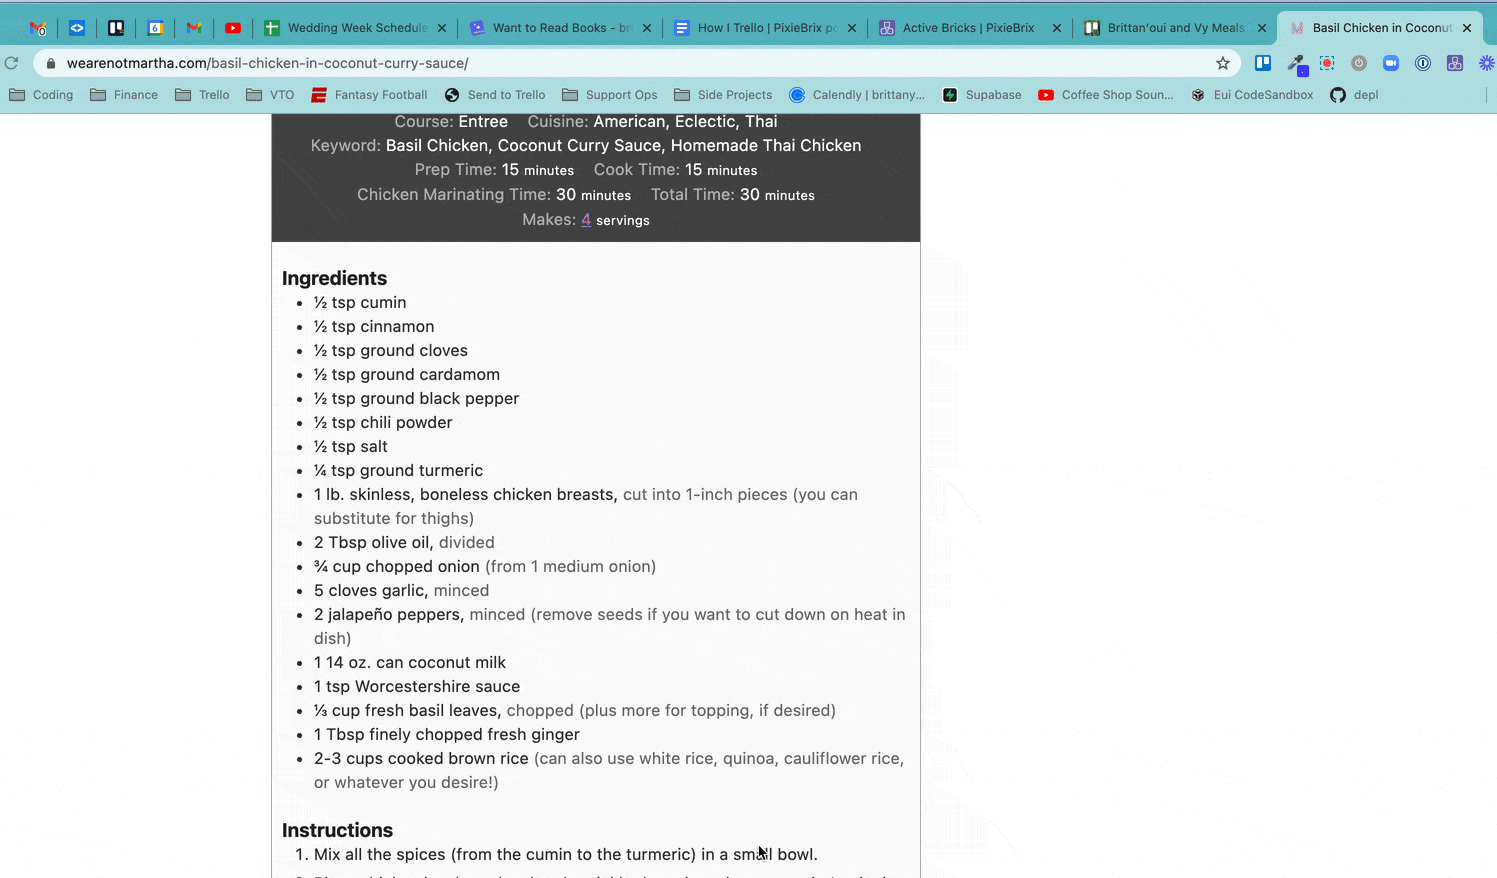
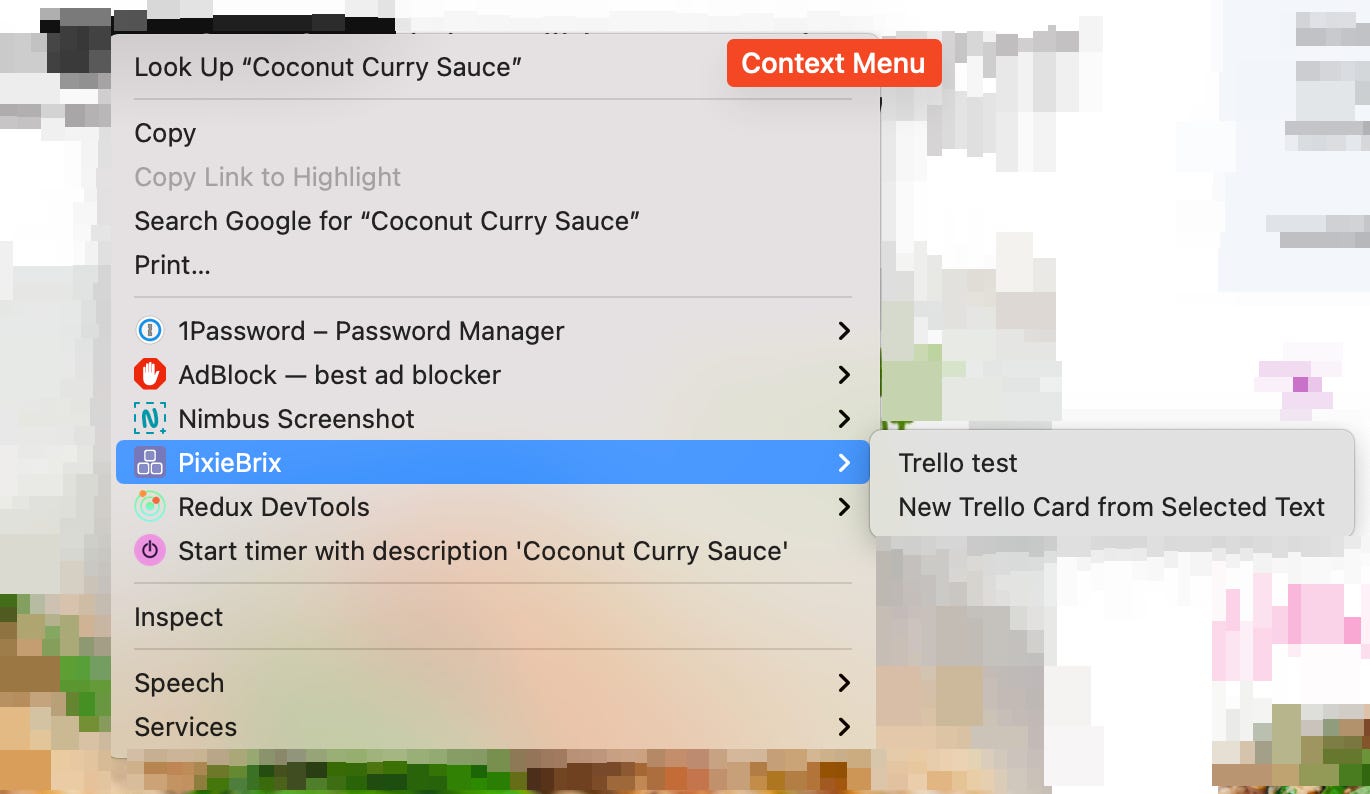
Let’s say that I want to make a new recipe and I want to quickly add items to a list in Trello. I can use my new Extension to highlight an ingredient and add it to my meal planning board.
And viola!
So this is pretty cool, but after playing around with it, I wanted to customize it a bit. For instance, I want to make the highlighted text be the card title. And I want to include the link that it comes from. I wondered if it was possible, and the good news - it totally is! All that's needed is a willingness to roll up your sleeves a bit and get into the page inspector 🕵️
Breaking Down What’s Happening in PixieBrix
Before we dive into how to do it, I want to take a look at what’s happening in the extension we just created so you can understand how to make your own.
Getting a little technical
If you’re not a developer, this next bit might feel a little intimidating, but I promise it looks scarier than it really is, and I’ll hold your (digital) hand the whole way through.
Okay, open up “Inspector” from any webpage in Chrome. You can do this by right-clicking anywhere on a page in Chrome, or by FN + F12 or Command + Option + C on Mac, or Command + Shift + C on Windows.)
This is what you’re looking for.

If you’ve never done this before, what pops up might make you feel like you’re about to walk into the Matrix. But don’t worry, you’re not. Look on the top bar and ignore everything else you see. Just look for the word “PixieBrix”
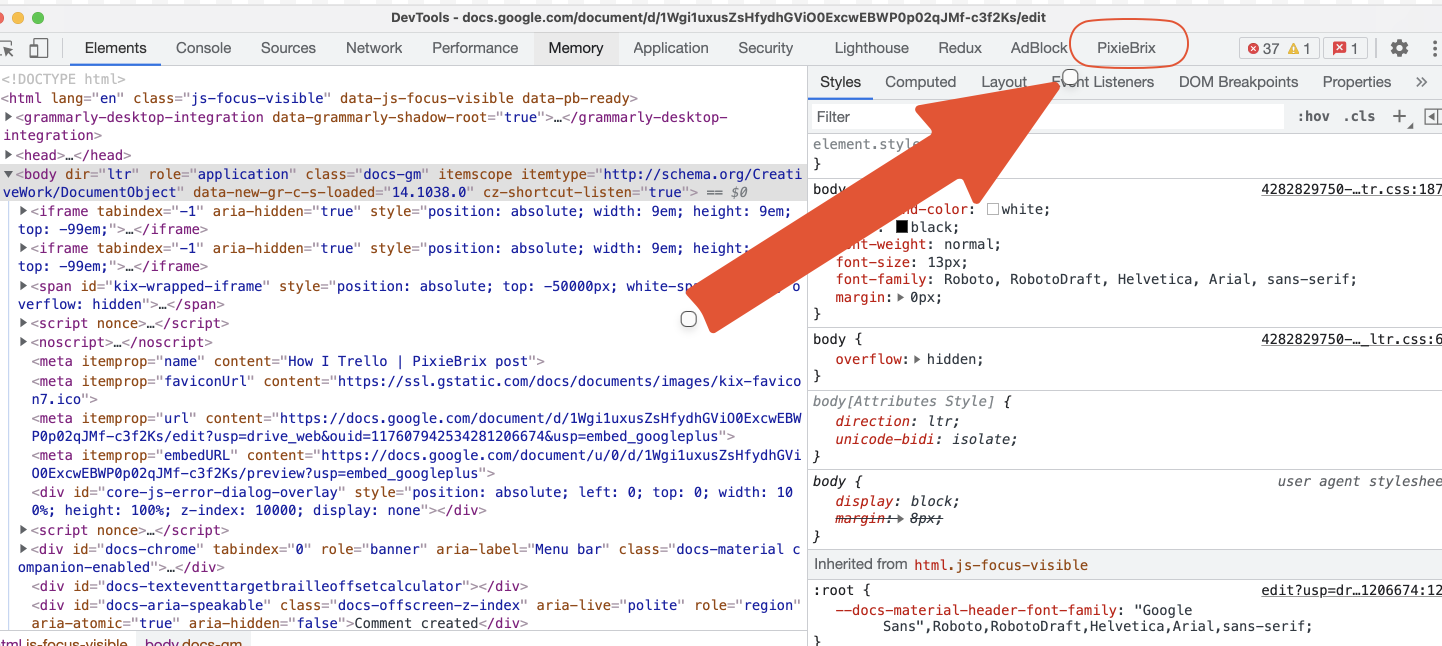
Don’t see it? You might have some arrows (like this)

Click those arrows and then you should be able to view it. (Still don’t see it? Make sure you installed the PixieBrix Chrome Extension.)
Now you can drag that bottom part of the screen with some code gibberish down and just ignore that. Feeling a little better now?
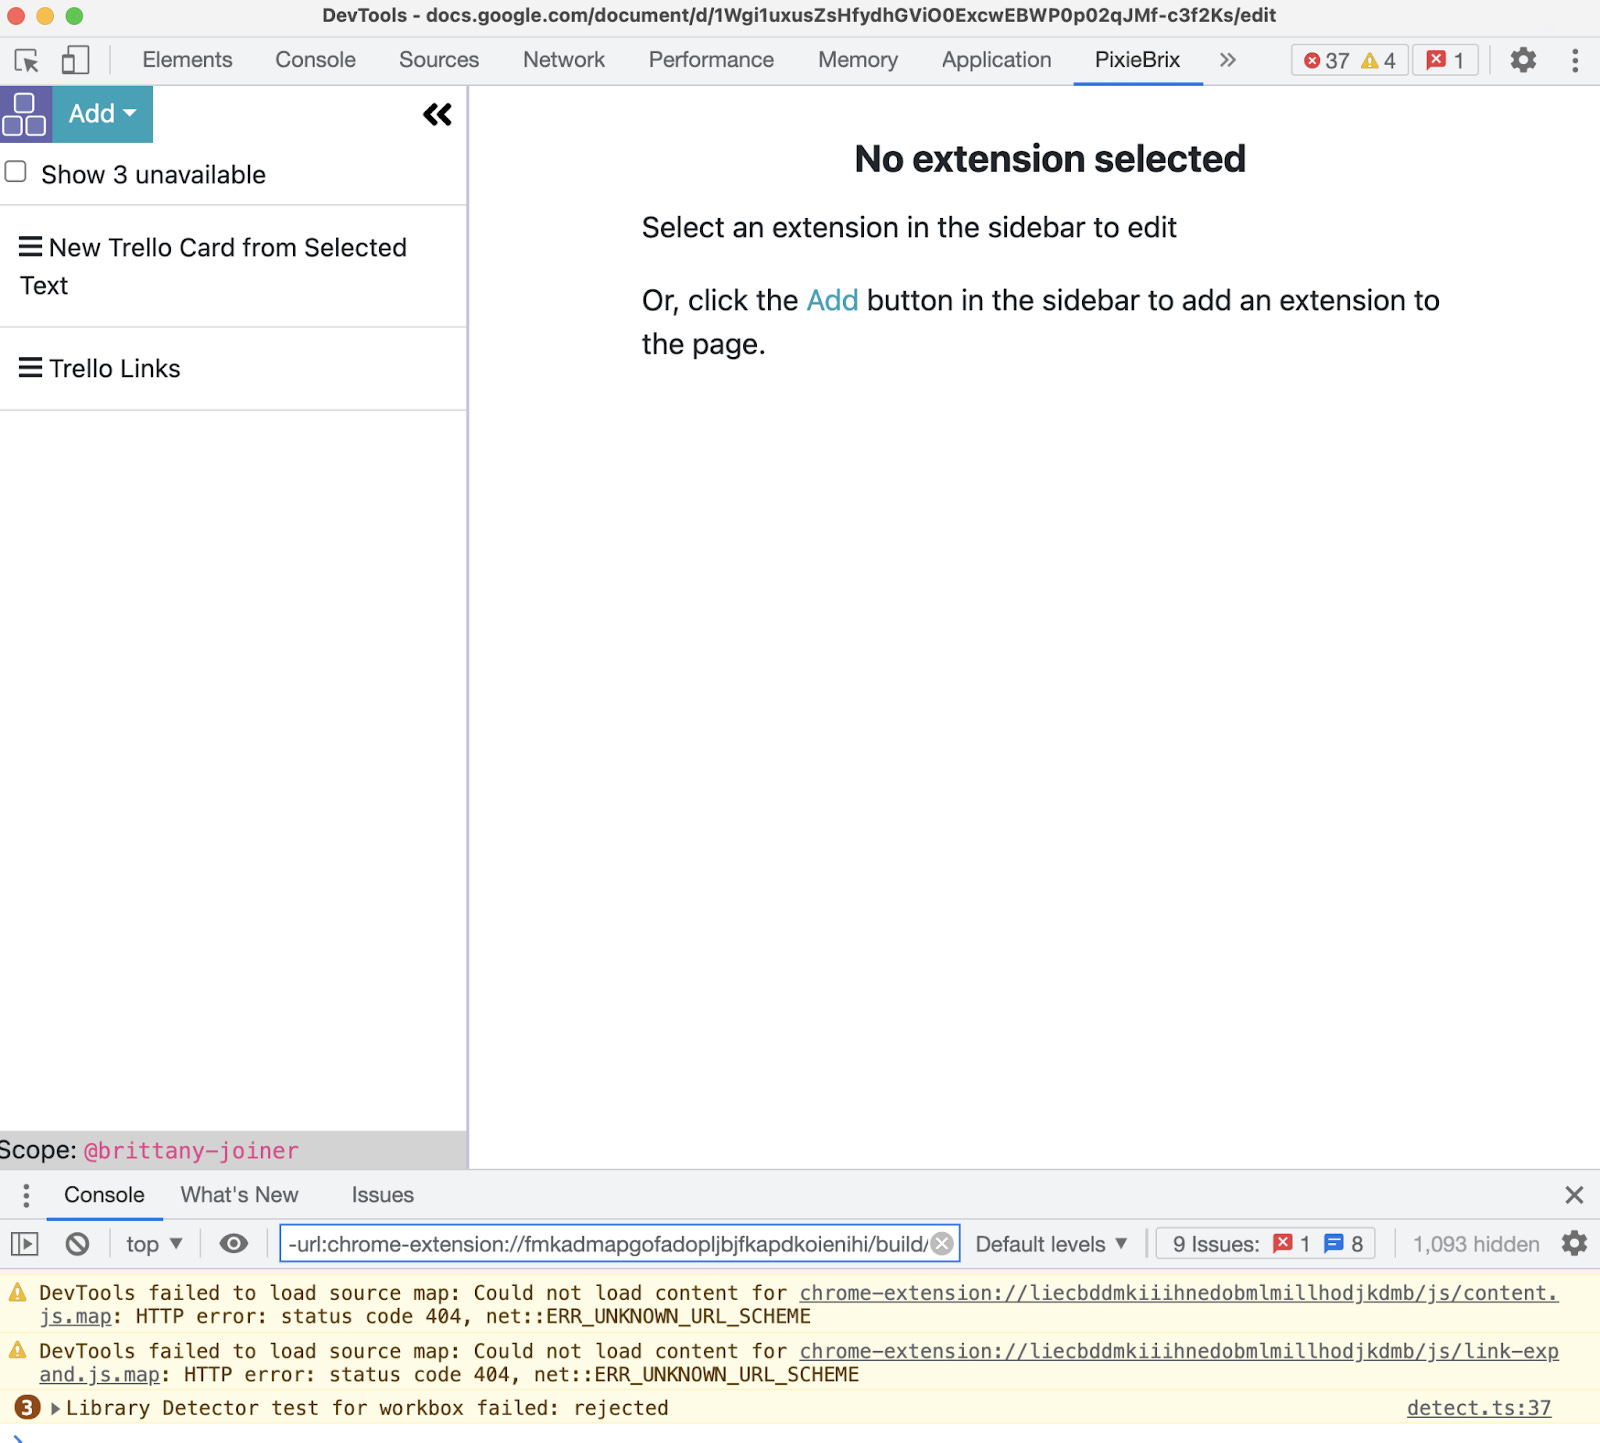
First of all, let’s take a look at that extension we just created “automagically” from the PixieBrix website. You should see it on the left side of your screen called “New Trello Card from Selected Text”. Click that.
Now you’ll be able to view each of these steps that make that extension do what it does.
We start with the first “brick” (each of these components is called a brick).
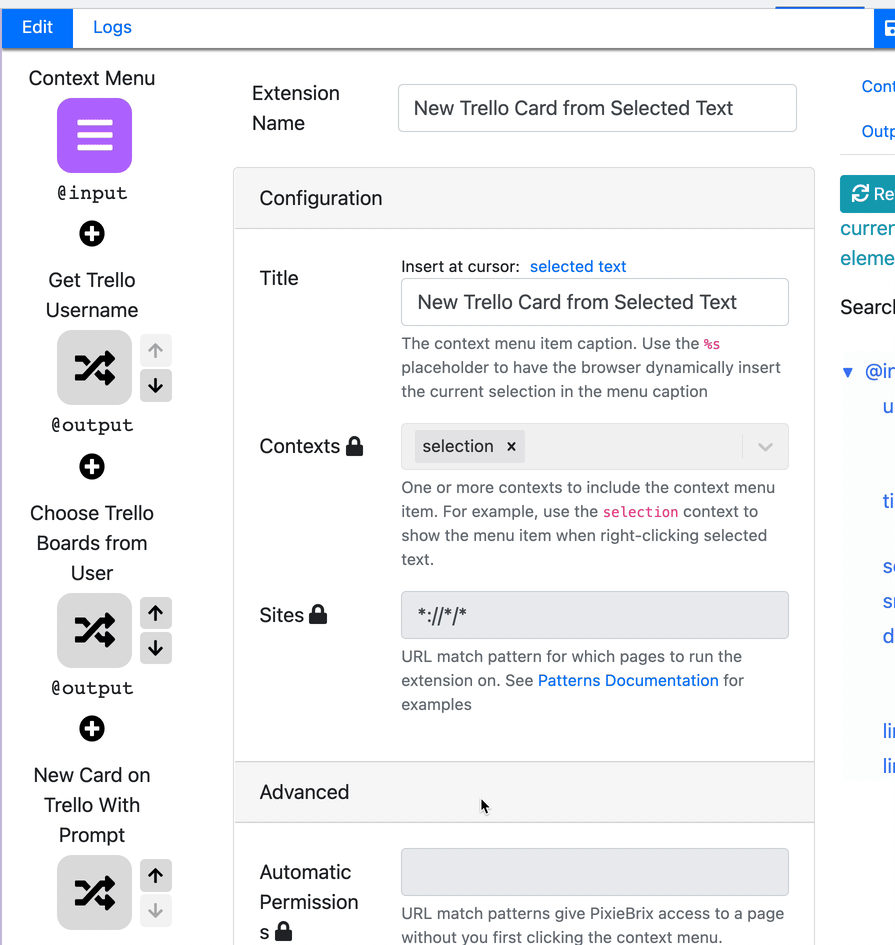
Context Menu
It’s a context menu brick, which means that it will show up when you right-click a webpage and then click PixeBrix. You can see which ones I’ve already got in place.
The settings on that brick help you understand what it’s doing. This just says it’s grabbing the selected text, and that this action can be done on any website.

Trello Info Bricks
The next couple of bricks just help you get info from Trello so that you can determine where to send the text you just highlighted.
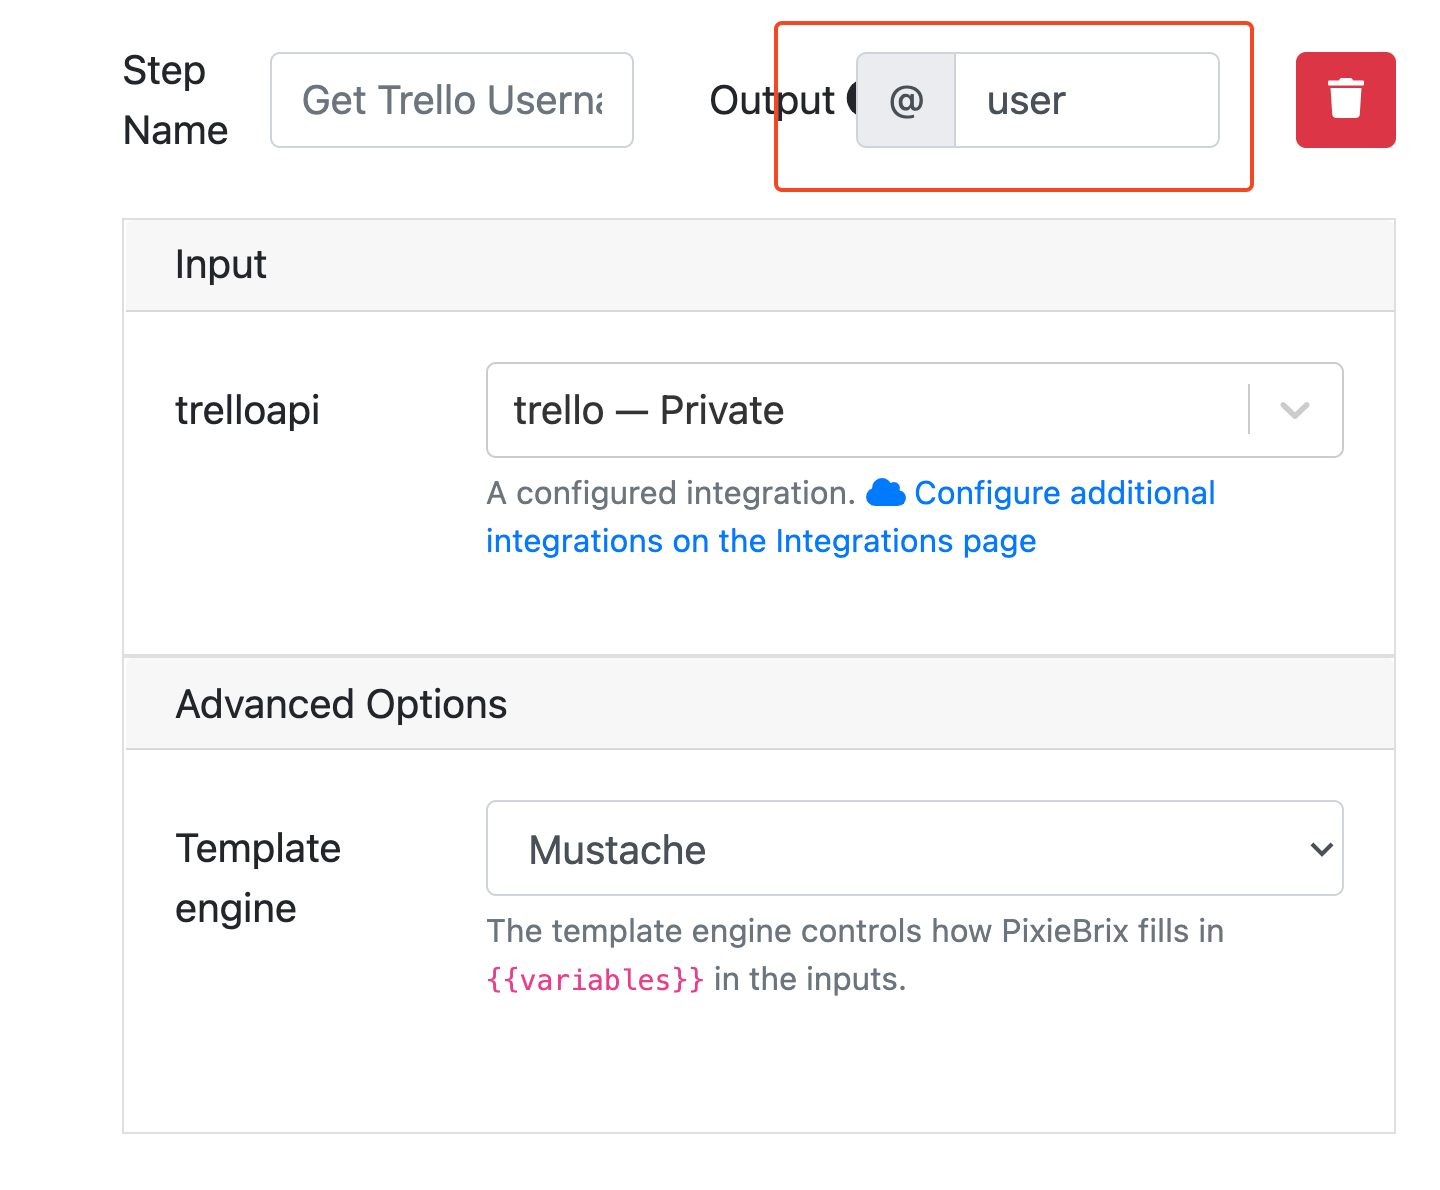
The first brick called `Get Trello Username` does just that - it registers who you are! Notice the Output section? The info that comes after that @ symbol is the variable name for referencing what is returned in that brick. What does that mean? It means if you use `@output` then you can reference that user ID in other places! For example, skip over to the next brick. It’s a prompt asking you to choose the board from the user. See how we are able to define the user based on using `@output` from the previous step?

This brick returns a list of that user’s boards and then spits out the one you select in - you guessed it! - another `@output`. So last brick brings up the popup that asks you which list and if you want to customize any text on it. You’ll see things in {{ }} and those are variables gathered from previous steps. For example, once you have the board ID, it can search for all the lists that belong to that board so you can select one. And then the `{{selectionText}}` variable is what grabs the text you highlighted.
Now that you understand how they work, let’s build one of our own that lets us grab text AND a link from a page and send it to Trello!
Building an Extension to Send Links to Trello
Step 1: Add the “Context Menu” brick.
If you’re not still in Inspector, follow the instructions above to get back to it, then click “Add” in the top left and click “Context Menu”.

The next page will let you search for one (feel free to go exploring if you want more ideas) or click “Create new Context Menu”.
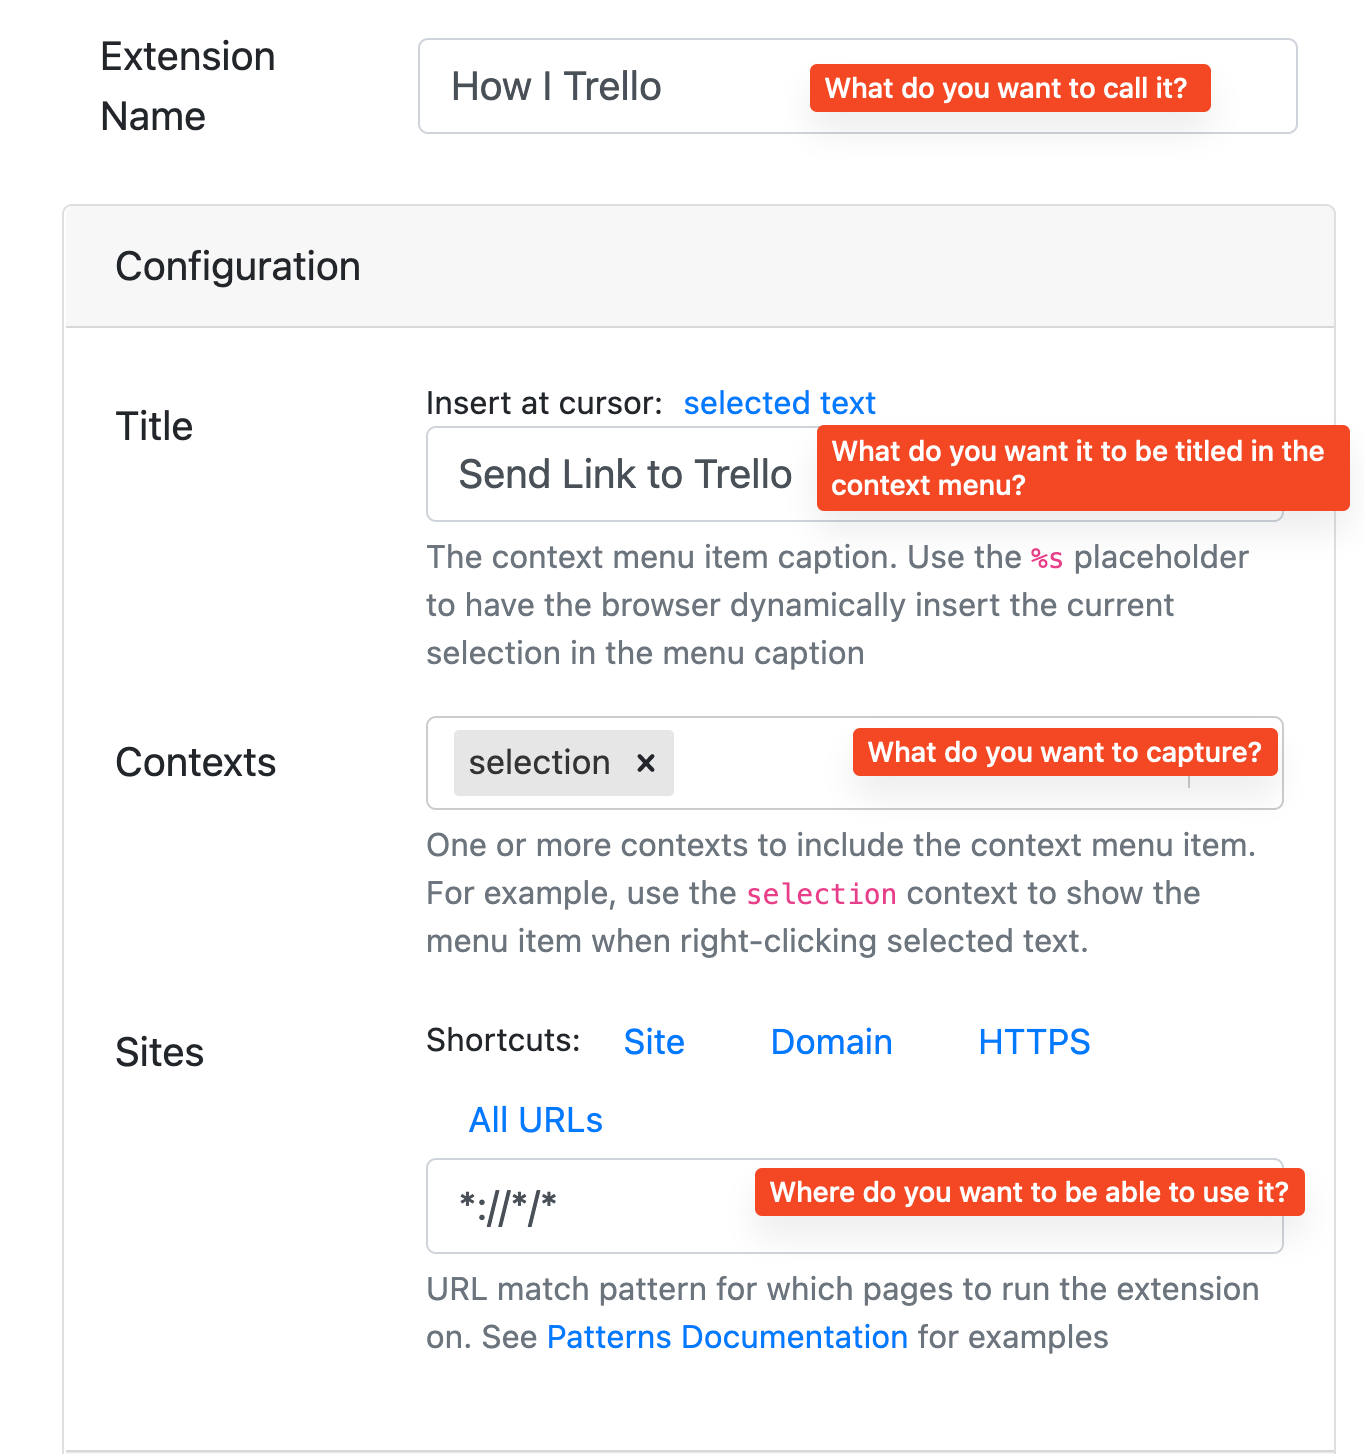
Let’s just change a few things in here, just like I’ve shown in the screenshot above. The Extension Name is where you’ll set what it’s called inside PixieBrix (this is what shows up on the left side of the PixieBrix menu where you can see all your Extensions). Title is the text you want to show up when you open the context menu after you highlight some text. If you want to include the highlighted text in the name, you can do that by typing `%s` (as shown in the comments below that field.) Contexts are where you set what you want to be pulled. By default, it will likely say “All” but since we want to use that highlighted text to name that card and add the link, we can just grab “Selection” and have all we need. Sites are where you define where you want to be able to use this extension. If you want to use it everywhere, just click the “All URLs” text and it will automatically update the field with the match pattern (translating where you want to see it into computer speak.
Step 2: Get Your Trello Data
For the next step, click the big + sign to the left of those settings.

When you click that search for the “Get Trello Username” brick. Once you add that (assuming you’ve already added your Trello account from the first example) you’ll be good to go. I prefer to change the output to “user” so I can keep track of what is being gathered from this step.
If you don’t have Trello configured or if you want to add another account, click the link to configure additional accounts!
Next, add the “Get Trello Boards from User” brick. This is where we’ll be able to select which board the card goes to.

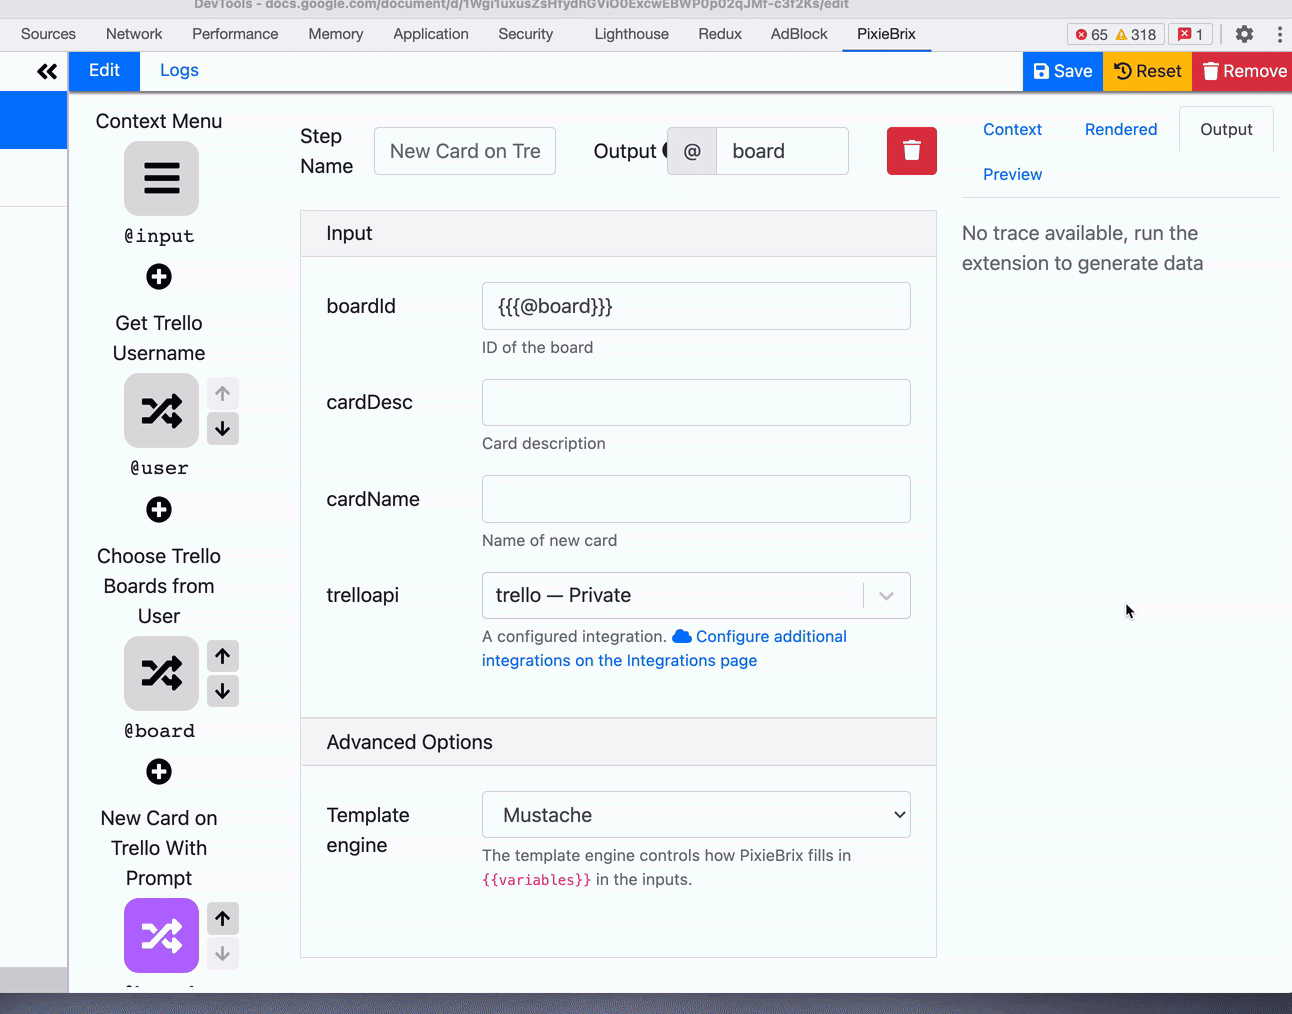
After you click add, you just need to configure the “user” field. All you need to do here is type `{{@user}}` in the user field and this will grab the data that PixieBrix collected in the last step. Next, change the output to “board” so you can easily reference it in the next step. (You don’t have to do this, you can leave it to whatever it defaults to, just remember to use that same variable name in the next step.)
Your brick should look like this.

Step 3: Create the card
Last step! Just click that big plus sign one more time to add one last brick. This one is called “New Card on Trello with Prompt”.
To get the board id from what we just set up, you’ll add the `{{{@board}}}` variable here. (Note! Pay very close attention to syntax here because you only use two {{ on the previous brick, but you have to wrap it in three {{{ here. If something doesn’t work, check that you formatted these correctly because it’s easy to trip up on!)
To name the other fields, you get to put whatever you want. Personally, I want the Card Name to be the highlighted text, and I want the description to include a link to the page. To grab these variables and plug them in, skip back up to the very brick - the Context Menu one. Don’t worry about clicking save, your brick will stay there. Once you’re in the context menu, check out the preview section on the right side of your screen to see what variables you have access to. If you want one, click the copy button near that field and then paste it where you want to use it. Like this!
Make sure to wrap them in the {{{ }}} and you’ll be good to go.
In the end, your brick should look like this.

Now, just click the blue “Save” button in the top right, and let’s try it out!
It works! If yours doesn’t, then double-check the way you’ve got your brick set up and compare it to the previous screenshots.
PS - Mine is so slow because I have (literally) a bajillion Trello boards - more than most users - so it should pop up much faster for you!
Here’s some help for debugging:
Are you sure the variables are all named correctly?
Is everything spelled correctly?
Wrapped in the right amount of curly brackets?
Are you referencing the right names for the outputs? Make sure each step references the exact name that’s in the output of the step you’re getting data from?
Did you grant permission to PixieBrix? (if you haven’t seen the prompt, reload the page.)
Did you edit the right extension? (Make sure you’re working on the right extension and making changes there - see which one is currently being worked on as it’s highlighted blue on the sidebar.)
Still stuck? Head to the PixieBrix community and ask your question.
What else?
This is a pretty basic example and use case of PixieBrix and only scratches the surface of everything you can do with it. Some other ideas could include:
Creating a button (or context menu) on any Github page (or Asana or Monday.com) that lets you create a Trello card with that data.
Send data from a Trello card to a Google sheet row.
Send data from Trello to another source (like Github/Monday.com/Asana)
Click a button on a Trello card to post a message in Slack saying you’re working on that card (or ask for a status update)
Basically anywhere you can think of “I wish there was an easier way to send this to Trello” or “I wish there was an easier way to send this Trello info somewhere else”, there’s a chance you can add a PixieBrix component to send that over.
So take it for a spin, try it out. If you can think of other things you’d like to integrate, I’d love to hear them and maybe I’ll write a future post about how to build it.
Note: PixieBrix did pay for this post, but I suggested the use case and had full control over the content, including my brutal honesty about the clunky UI :) So you can trust everything in here is still coming from me, even if it’s sponsored.